How-To: Quickly Create a Strongly-Typed REST Client for an API
UnoFeatures:
HttpRefit(add to<UnoFeatures>in your.csproj)
When accessing resources with a REST-style API is a significant part of your application, it is common to look for an SDK that provides a strongly-typed client for the API. This allows you to avoid writing boilerplate code to make requests and deserialize responses. There is sometimes no SDK available yet for the API you want to use, or it's not compatible with your target platform. With the design goal of avoiding boilerplate code in mind, we will walk through how to use Refit to quickly create a strongly-typed client for a REST API and register it with the service collection as an endpoint.
Step-by-step
Important
This guide assumes you used the template wizard or dotnet new unoapp to create your solution. If not, it is recommended that you follow the Creating an application with Uno.Extensions documentation to create an application from the template.
1. Installation
Add
HttpRefitto the<UnoFeatures>property in the Class Library (.csproj) file.<UnoFeatures> Material; Extensions; + HttpRefit; Toolkit; MVUX; </UnoFeatures>
2. Enable HTTP
When working with a complex application, centralized registration of your API endpoints is a good practice. This allows you to easily change the endpoint for a given service. It also reduces the complexity to adding new services which can then have their
HttpClientinstance reused across multiple instances of view models or other services.The first step to centrally registering any API endpoint is to enable HTTP on the
IHostBuilder:protected override void OnLaunched(LaunchActivatedEventArgs args) { var appBuilder = this.CreateBuilder(args) .Configure(hostBuilder => { hostBuilder.UseHttp(); }); ... }The HttpRefit UnoFeature automatically includes the
Uno.Extensions.Http.WinUIpackage, which uses Microsoft Extensions for any HTTP-related work such as naming or configuring theHttpClientinstance associated with your endpoints.
3. Define the live interface
For the purposes of this tutorial, we will create and register an interface for the Chuck Norris facts web API which is documented here
This interface will be used to generate the strongly-typed client. It will be used to make requests to the web service and deserialize responses.
Start by defining an interface
IChuckNorrisEndpointwith a methodSearch()that returns aTaskof typeApiResponse<ChuckNorrisData>:[Headers("Content-Type: application/json")] public interface IChuckNorrisEndpoint { [Get("/jokes/search")] Task<ApiResponse<ChuckNorrisData>> Search(CancellationToken ct, [AliasAs("query")] string searchTerm); }Note
A class named
ChuckNorrisDatawill be defined in the next section of this guide. It will be used to deserialize the response from the API.The
Headersattribute is used to specify theContent-Typeheader for the request.Getspecifies the relative path for aSearchrequest. Notice that thesearchTermparameter for the request is aliased asqueryusing anAliasAsattribute.ApiResponse<T>is used to deserialize the response from the API. It is defined in theRefitpackage.
4. Generate a data model from the API response
The next step is to generate a data model from the response we will get from the API. This will be used to deserialize the response which we'll learn is a JSON object with a
totalproperty andresultthat contains an array of Chuck Norris data objects.By the end of this section, a
ChuckNorrisDataclass will be defined in theModelsnamespace to represent each object in the array.We will use Hoppscotch to make an HTTP request and inspect the response. Open it, and make a
GETrequest to the/jokes/searchendpoint with the query parameterqueryset tofight.Your screen should appear similar to this:
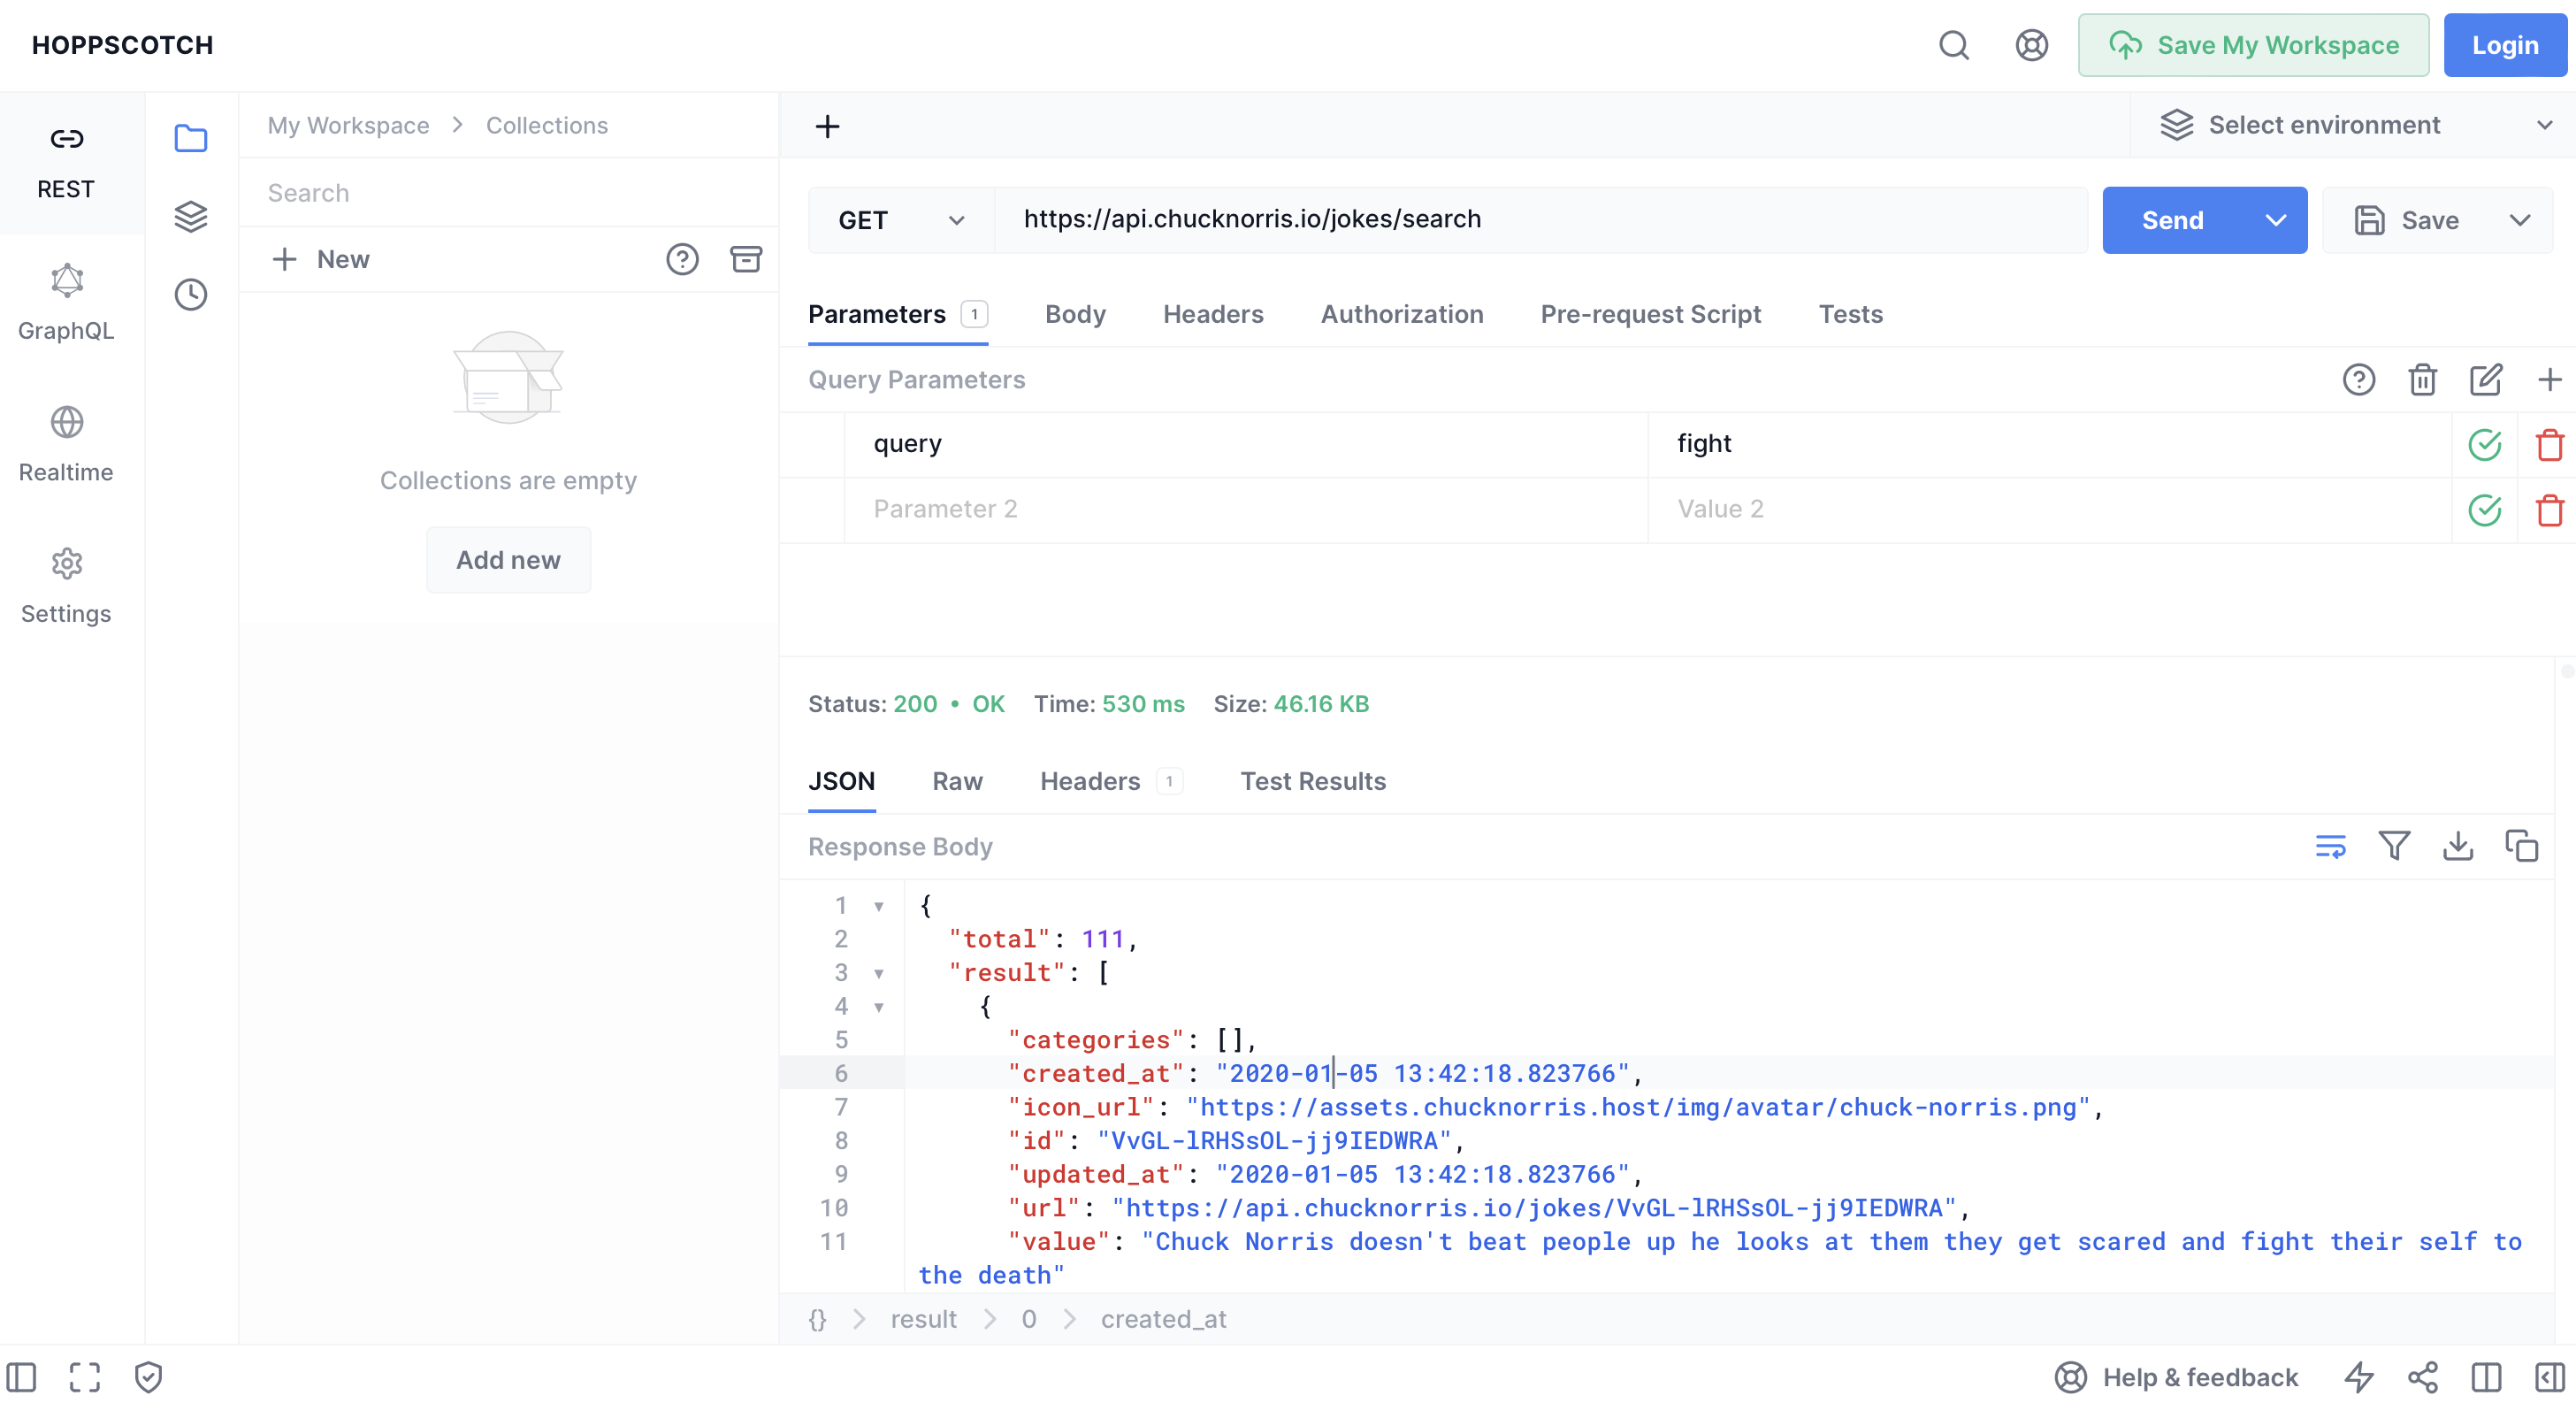
For informational purposes, this is the full HTTP request URL:
GET https://api.chucknorris.io/jokes/search?query=fightThe response body pane will populate with a formatted JSON object that looks similar to this:
{
    "total": 111,
    "result": [
        {
            "categories": [],
            "created_at": "2020-01-05 13:42:18.823766",
            "icon_url": "https://assets.chucknorris.host/img/avatar/chuck-norris.png",
            "id": "VvGL-lRHSsOL-jj9IEDWRA",
            "updated_at": "2020-01-05 13:42:18.823766",
            "url": "https://api.chucknorris.io/jokes/VvGL-lRHSsOL-jj9IEDWRA",
            "value": "Chuck Norris doesn't beat people up he looks at them they get scared and fight their self to the death"
        },
    ...
    ]
}
Since this response is needed for the next step, copy the entire JSON object from the response body pane
Next, we need to use a language-agnostic tool that infers a data model from the response we recieved. We will open quicktype and use it to generate a data model from the JSON we copied above
Replace any demo text in the left JSON pane with our text by pasting the JSON object into editor
Within the properties box on the right side, make the following selections:
C# as the language
System Text Json as the serialization framework
Complete as the output features
Your screen should appear similar to this:
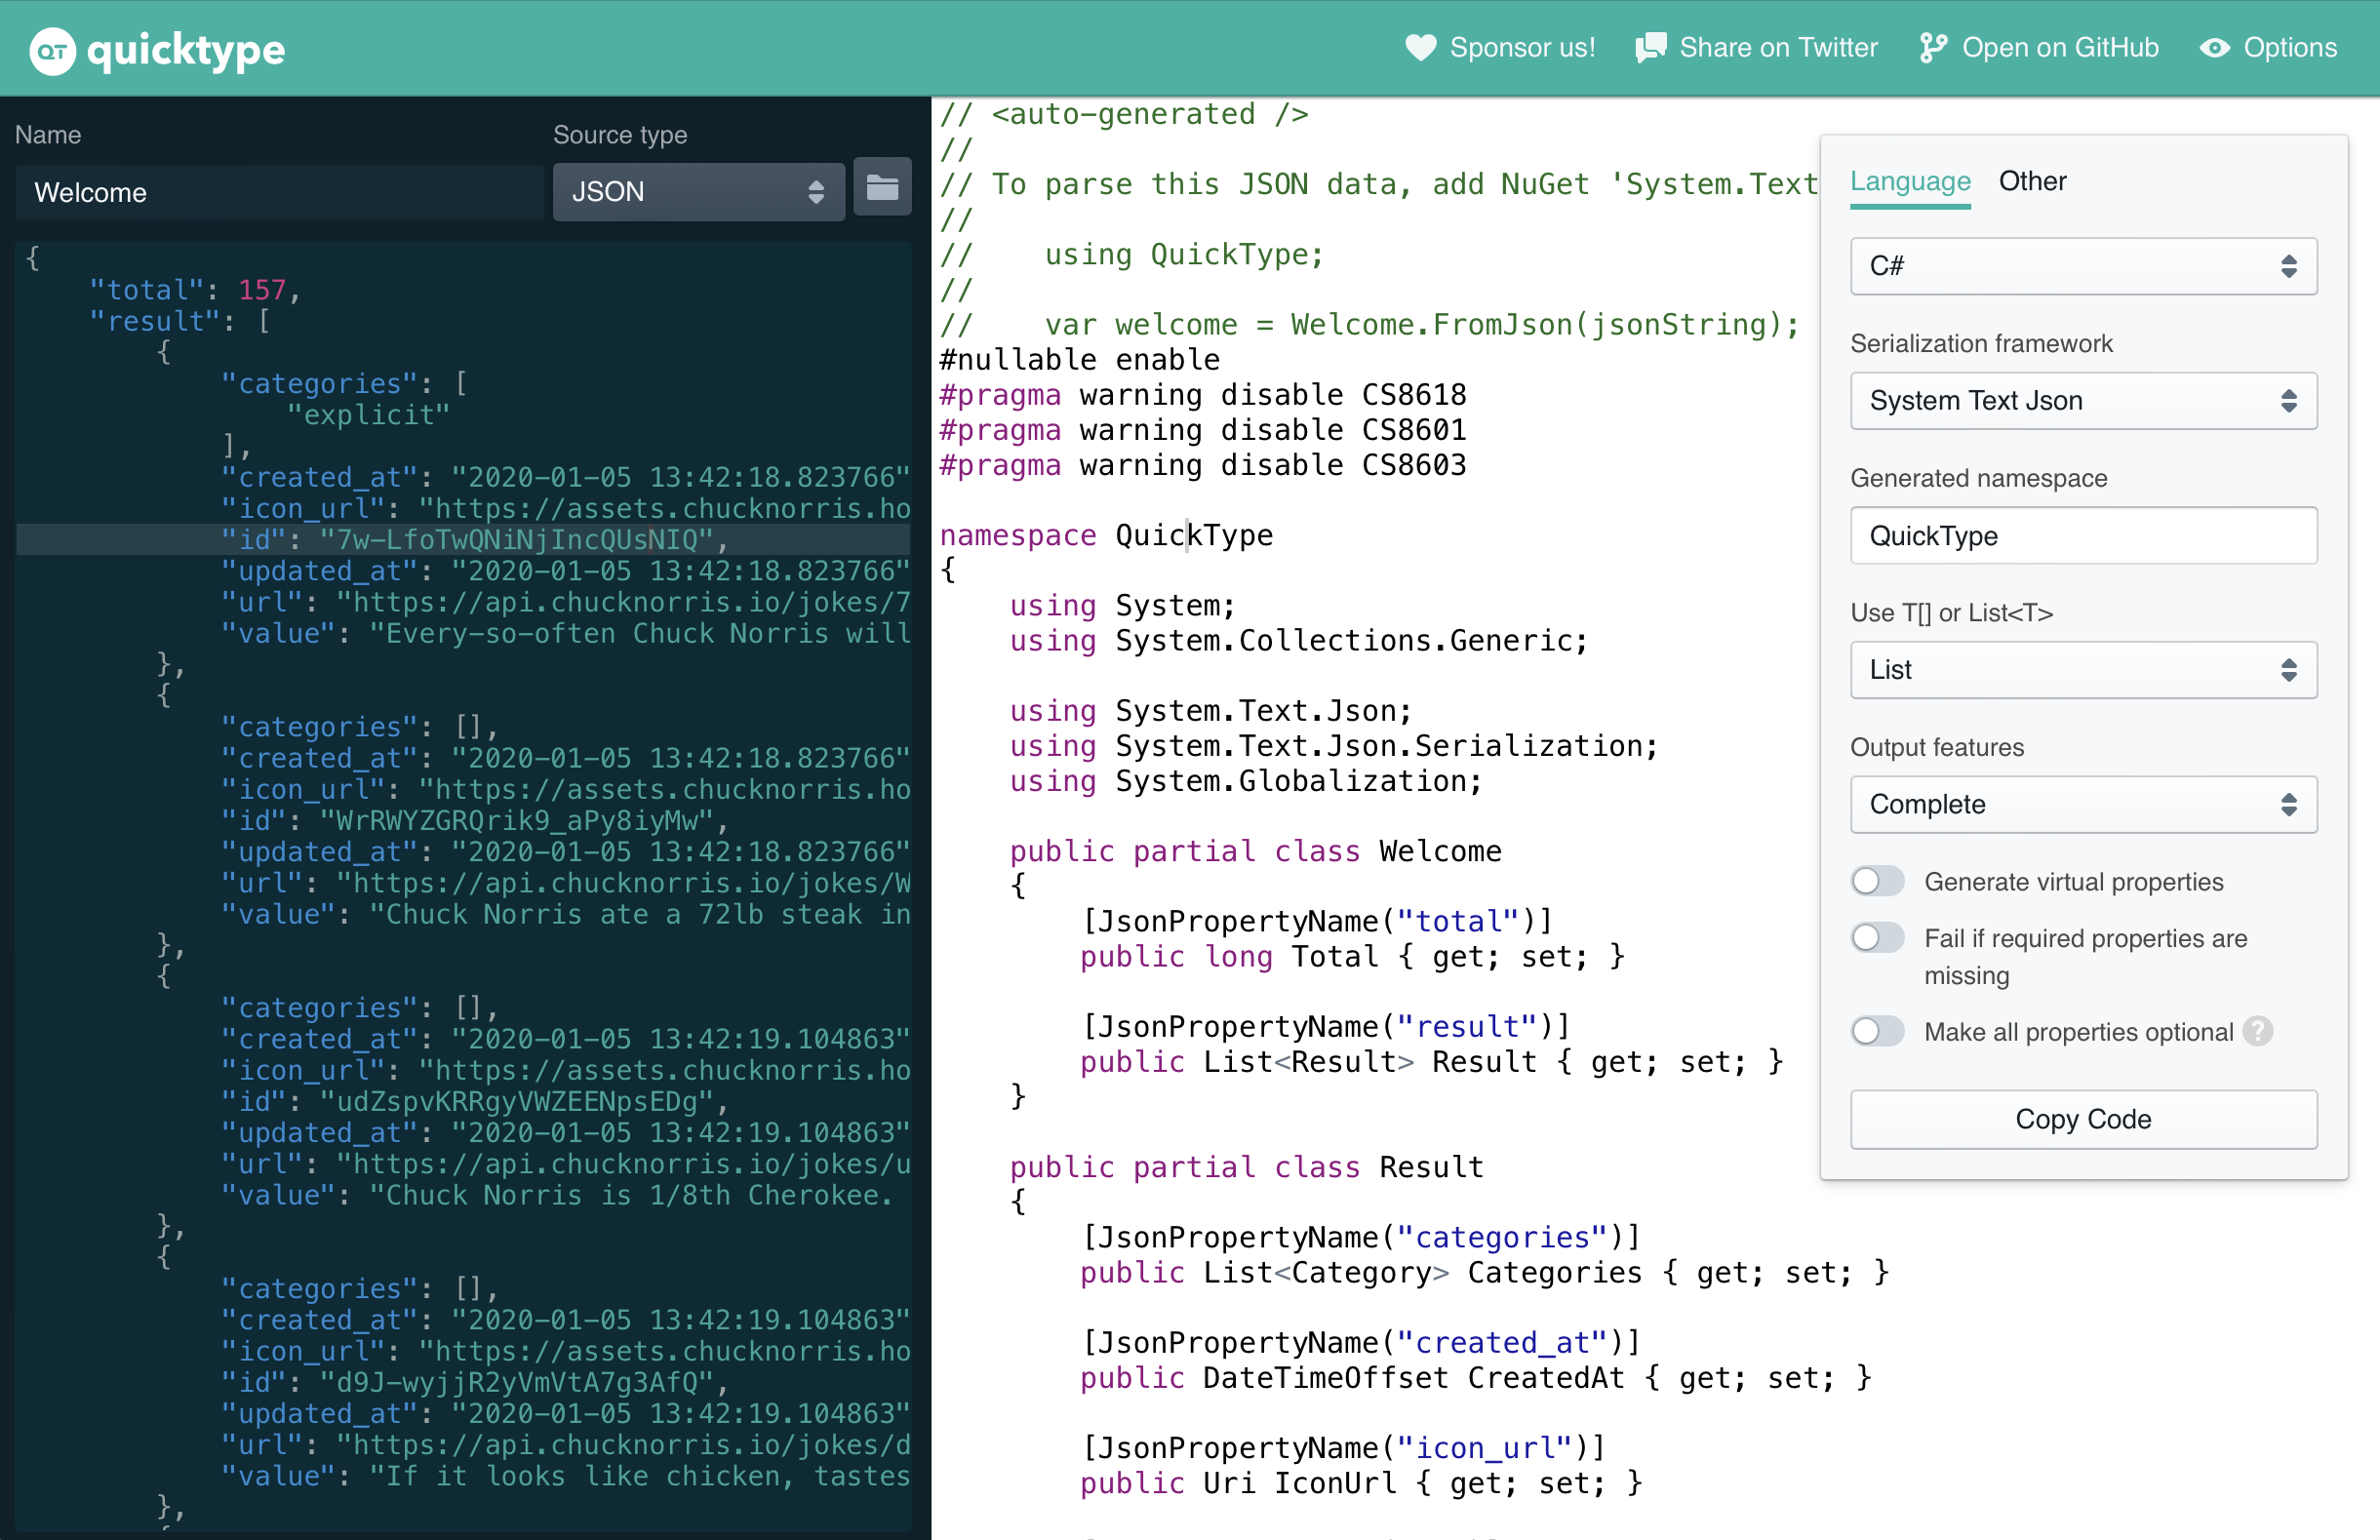
For the purposes of this tutorial, only select and copy the two model classes
WelcomeandResultfrom the right side containing the generated C# code.What you copied should appear like this:
public partial class Welcome
{
    [JsonPropertyName("total")]
    public long Total { get; set; }

    [JsonPropertyName("result")]
    public List<Result> Result { get; set; }
}

public partial class Result
{
    [JsonPropertyName("categories")]
    public List<Category> Categories { get; set; }

    [JsonPropertyName("created_at")]
    public DateTimeOffset CreatedAt { get; set; }

    [JsonPropertyName("icon_url")]
    public Uri IconUrl { get; set; }

    [JsonPropertyName("id")]
    public string Id { get; set; }

    [JsonPropertyName("updated_at")]
    public DateTimeOffset UpdatedAt { get; set; }

    [JsonPropertyName("url")]
    public Uri Url { get; set; }

    [JsonPropertyName("value")]
    public string Value { get; set; }
}
Go back to Visual Studio and create a new folder named
Modelsin the shared project. Create a new file namedChuckNorrisData.csin theModelsfolder and paste the code you copied into it.Rename the partial classes
WelcometoChuckNorrisDataandResulttoChuckNorrisDataResult
5. Register the endpoint
Unlike standard HTTP endpoints, Refit endpoints you define will be registered as a service with the
AddRefitClient<T>()extension method, where the type argumentTcorresponds to an interface you define.This extension method can take a delegate as its argument:
protected override void OnLaunched(LaunchActivatedEventArgs args)
{
    var appBuilder = this.CreateBuilder(args)
        .Configure(hostBuilder =>
        {
            hostBuilder.UseHttp((context, services) =>
                services.AddRefitClient<IChuckNorrisEndpoint>(context, httpClient =>
                {
                    httpClient.BaseAddress = new Uri("https://api.chucknorris.io/");
                })
            );
        });
    ...
}
Another way to configure an HTTP client is to specify a configuration section name. This allows you to configure the added HTTP client using the
appsettings.jsonfile. This tutorial demonstrates use of the configuration section method.Add the Refit client to the service collection with the following code instead:
protected override void OnLaunched(LaunchActivatedEventArgs args)
{
    var appBuilder = this.CreateBuilder(args)
        .Configure(hostBuilder =>
        {
            hostBuilder.UseHttp((context, services) =>
                services.AddRefitClient<IChuckNorrisEndpoint>(context)
            );
        });
    ...
}
Look for a file named
appsettings.jsonin the shared project. If it does not exist, create it. Open this file and add the following JSON:{ "ChuckNorrisEndpoint": { "Url": "https://api.chucknorris.io/", "UseNativeHandler": true } }The
Urlproperty specifies the base URL for the API.We set
UseNativeHandlertotrueto use the native HTTP handler for the platform. This is recommended for production apps unless you have a specific reason to use the managed handler.On Windows, intercepting the network traffic of your app with tools like Fiddler is not possible when using the native handler. This is because it does not use a compatible network stack.
In these cases, you can set
UseNativeHandlertofalseto use the managed handler instead
That block of JSON from the above file is called a configuration section. In this case, it's used to configure the HTTP client associated with the endpoint. For more information, see the overview for configuration sections.
Observe that the name of the configuration section is similar to that of the endpoint interface we defined earlier. By default, the interface name without the leading
Iprefix is assumed to be the section name. This can be overridden by specifying a name while registering the service. The name you use should be the second argument toAddRefitClient<T>().
6. Use the endpoint
IChuckNorrisEndpointcan now be used in a service implementation by injecting it into the constructor. This interface will be used to make requests to the web service and deserialize responses.For the purposes of this tutorial, we will create a view model for the page that triggers the request for a Chuck Norris fact named
FactViewModel. It will have a methodSearchAsync()that returns aTaskof typeChuckNorrisData:public class FactViewModel { private readonly IChuckNorrisEndpoint _endpoint; public FactViewModel(IChuckNorrisEndpoint endpoint) { _endpoint = endpoint; } public async Task<ChuckNorrisData> SearchAsync(string searchTerm) { var response = await _endpoint.Search(CancellationToken.None, searchTerm); if (response.IsSuccessStatusCode && response.Content is not null) { // Return first result var content = response.Content; return content.Result[0]; } _logger.LogError(response.Error, "An error occurred while retrieving the latest fact."); return Task.FromException<ChuckNorrisData>(response.Error); } }Now, any views that need to display a Chuck Norris fact can use the
FactViewModelto retrieve one. Thanks to the use of Refit, the details of HTTP requests and deserialization are abstracted away from the view, and boilerplate code is avoided.